7 Forearm Tattoo Stencil Rules for Designs That Fit the Arm (2026 Guide)
Forearm tattoo stencils fail when they ignore that the forearm is a cylinder, not a canvas. Learn the seven rules for wrap sizing, inner versus outer skin, muscle flex, and the elbow-to-wrist taper that keeps a design readable.
Quick answer
A forearm tattoo stencil has to fit a cylinder, not a flat page: size the design against your actual arm circumference, keep detail bolder on the thin inner-forearm skin, place the stencil with the muscle at rest, and expect the outer forearm to fade faster from sun. The two most common failures are a design drawn for flat paper that pinches when it wraps, and a size that was never taped to the arm and test-fit before transfer.
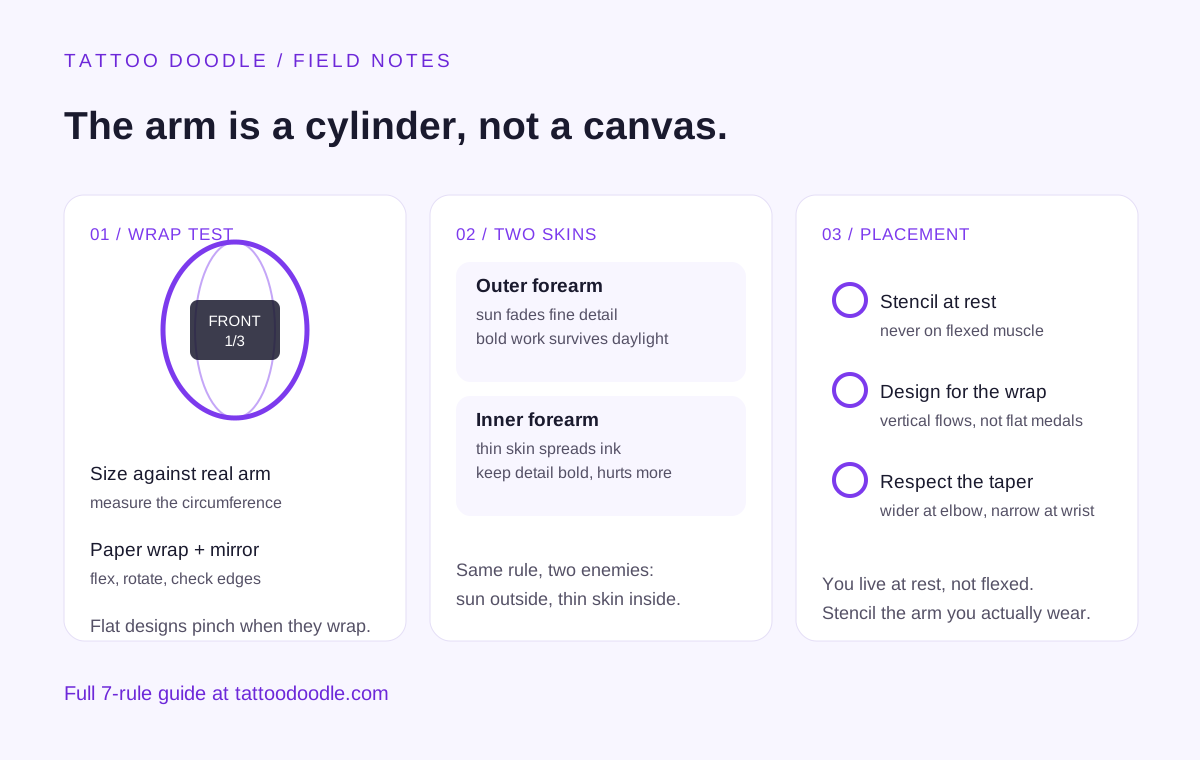
The forearm is the most-requested visible placement in tattoo shops, and it is also the placement where stencils fail most quietly. On paper your design looked perfect. On the arm, it wraps too far around the side, the inner lines blurred within a year, and the straight composition suddenly looks crooked when you flex. None of that was the artist's fault. It was a stencil built for a flat rectangle and pasted onto a living cylinder.
This guide is about the forearm specifically — the geometry, the skin, and the seven rules that make a stencil fit the arm instead of fighting it.
1. The Forearm Is a Cylinder, Not a Canvas
This is the foundational mistake, so it gets the first section. Every stencil you download or draw starts life on a flat screen or flat paper. Your forearm is a tapered cylinder that changes width from wrist to elbow, that rotates, and that carries muscles that slide under the skin when you move. A design that fills a rectangle beautifully will distort when wrapped: horizontal compositions pinch at the edges, text bows upward, and geometric patterns lose their symmetry.
My editorial take, and the thing I tell every friend before they book: if the design only exists on flat paper, it is not finished yet. It becomes a forearm design the moment you wrap it around your actual arm — with a printout, tape, and a mirror — and check what the edges do. That five-minute wrap test catches more failures than any design skill.
2. Know Your Two Forearms: Inner vs. Outer
The forearm is really two canvases, and they behave differently:
- Outer forearm. Thicker, tougher skin. Takes ink reliably and heals predictably. But it faces the sun every day, so fine detail and light shading fade faster here than anywhere else on the arm. This is the canvas for bold work that has to survive daylight.
- Inner forearm. Thin, delicate skin, largely protected from sun — so ink holds its sharpness longer. The trade-off: the thin skin lets ink spread slightly more, which means hairline detail blurs faster, and it hurts more (the skin is thin and the nerves sit closer to the surface). It is also the more private canvas, easy to hide by turning your arm.
The stencil implications are direct. On the outer forearm, simplify and bold up fine detail because sun will soften it. On the inner forearm, bold up fine detail because the skin itself will soften it. Same rule, two different enemies. And if you are planning one design to flow across both faces, the middle band of the wrap — the transition zone — is where compositions most often break.
3. The Seven Stencil Rules for Forearms
Rule 1: Size against your real arm, not the screen
Measure your forearm circumference at the widest point of the planned design with a soft tape. A design drawn eight inches wide will wrap nearly all the way around a smaller forearm — the composition you thought was frontal becomes a full wrap, and any asymmetry in it shows. Write down the circumference, decide what fraction of it the design should occupy (roughly one third to one half for a frontal composition), and size the print from that number. Never scale by eye.
Rule 2: Do the paper wrap test
Print the design at actual size on regular paper, cut it out, and tape it to your forearm. Then move: rotate your wrist, flex, extend, look in a mirror from three feet away. This is the stencil equivalent of a dress rehearsal, and it reveals three things no screen ever will — where the edges land when the arm rotates, whether the design reads at conversation distance, and whether text stays level when the muscle moves. Adjust the print, re-tape, repeat. Paper is cheap; regret is not.
Rule 3: Place the stencil with the muscle at rest
Here is the rule most people get backwards. The arm looks bigger and more defined when flexed, so it is tempting to stencil a flexed forearm. Do not. You spend most of your life with the muscle at rest, and a design placed on flexed muscle distorts when the arm relaxes — circles become ovals, straight lines drift. Place and stencil at rest. If your design must look good flexed too (a bicep-adjacent piece, for example), test both positions during the paper wrap test and choose the compromise placement.
Rule 4: Design for the wrap, not the flat
Compositions that live happily on rectangles suffer on cylinders. Centered medallions and straight horizontal text are the highest-risk shapes: they bow and pinch at the edges of the wrap. Forearm-native compositions flow with the cylinder instead — vertical compositions that run wrist-to-elbow, wraparound bands and vines that use the curve, and designs with an anchor point on the front that lets the edges taper naturally around the sides. When you evaluate a downloaded stencil, ask one question: what does this look like from forty-five degrees to the side? If the answer is "a sliver of the design," rethink the composition.
Rule 5: Respect the elbow-to-wrist taper
The forearm is not a perfect cylinder; it narrows toward the wrist. A rectangle of stencil that fits at the elbow will overlap itself at the wrist, and a design sized for the wrist floats in empty space at the elbow. For any design longer than a few inches, size it against the circumference at each end and taper the stencil accordingly — or choose a composition that naturally narrows, which is why so many successful forearm pieces are wider near the elbow and pointed near the wrist. The taper is not a problem to hide; it is the shape successful designs are built around.
Rule 6: Keep inner-forearm detail bold
As noted in section two, the inner forearm's thin skin spreads ink slightly. What this means for your stencil: any line thinner than what a ballpoint pen leaves will soften over the first year or two. Merge hairlines into bolder contours during the stencil cleanup pass, keep negative space between close lines (crowded lines merge into blobs on thin skin), and be honest about lettering size — inner-forearm script smaller than a fingertip's width is a blur waiting to happen. Bold is not a style compromise here; it is how the design survives.
Rule 7: Put your most delicate work where the sun cannot reach
Sun is the great eraser, and the outer forearm catches more of it than almost any other placement. Fine linework, subtle gray washes, and light color on the outer forearm will soften noticeably faster than the same work on the inner side. Two practical answers: either place the delicate parts of the composition on the inner or under-side of the forearm, or commit to sunscreen on the tattoo as a daily habit — the artists I respect most treat SPF on outer-forearm tattoos as part of the aftercare, not an optional extra. Your stencil cannot control the sun, but it can decide which parts of the design the sun is allowed to touch.
4. What to Bring to the Consultation
A good artist will re-draw or adapt your stencil anyway — that is their job, and it is why you are paying them. What they cannot do is guess your intent. Bring three things: the design you want, the paper wrap test photos (front and side, arm at rest), and one sentence about placement priority — "it has to read from the front" or "it should flow around the whole arm." That sentence decides half the composition questions before they are asked. And ask directly: "What would you change about this stencil for my arm?" The answer tells you everything about how carefully they think.
FAQ
Do forearm tattoos hurt more than other placements?
It depends on the side. The outer forearm is one of the least painful placements — thick skin, some muscle padding. The inner forearm hurts noticeably more because the skin is thin and nerves run close to the surface, especially near the wrist and the inner elbow. Most people describe the outer forearm as a dull scratch and the inner as a sharper sting.
How do I keep a forearm stencil from distorting when I move?
Place the stencil with the muscle at rest, and favor compositions that flow with the cylinder — vertical, wraparound, or anchored designs — over flat compositions like centered medallions and straight horizontal text. The paper wrap test, done while moving your arm, shows you exactly where distortion appears before any ink is involved.
Will my forearm tattoo fade faster than tattoos elsewhere?
The outer forearm fades faster than average because of daily sun exposure; the inner forearm holds ink well because it is mostly shaded. If the design lives on the outer side, daily sunscreen is the single most effective thing you can do. Bold linework also holds up longer than fine detail under sun.
What size should a forearm tattoo be?
There is no universal size, but there is a universal method: measure your arm circumference, decide what fraction the design should cover (about one third to one half for a frontal piece), and print at that size before committing. Most people underestimate — screens make designs feel bigger than they are, so the paper wrap test almost always corrects the size upward.
Can I put text on my forearm?
Yes, with two cautions. First, text follows the cylinder, so long straight lines of lettering bow when the arm rotates — shorter phrases and curved baselines survive better. Second, script on the inner forearm needs to be bolder and larger than you think; thin lettering on thin skin blurs. Always do the wrap test with the exact lettering, at the exact size, before transfer day.
Related Articles
- 7 Printable Outline Tattoo Stencil Mistakes That Ruin the Transfer (2026 Guide)
- How to Design a Tattoo Stencil at Home: The 5-Step Workflow (2026 Guide)
- 7 Tattoo Sleeve Ideas That Won't Waste 20 Hours in the Chair (2026 Guide)
- Tattoo Styles: What Every Major Style Is, How It Ages, and How to Choose Yours