7 Tattoo Sleeve Ideas That Won't Waste 20 Hours in the Chair (2026 Guide)
A sleeve is the biggest commitment in tattooing — 15 to 25 hours and thousands of dollars. These seven sleeve ideas actually work at arm scale, plus the centerpiece-background-filler formula, session budgeting, and the planning mistakes that turn sleeves into sticker collections.
Quick answer
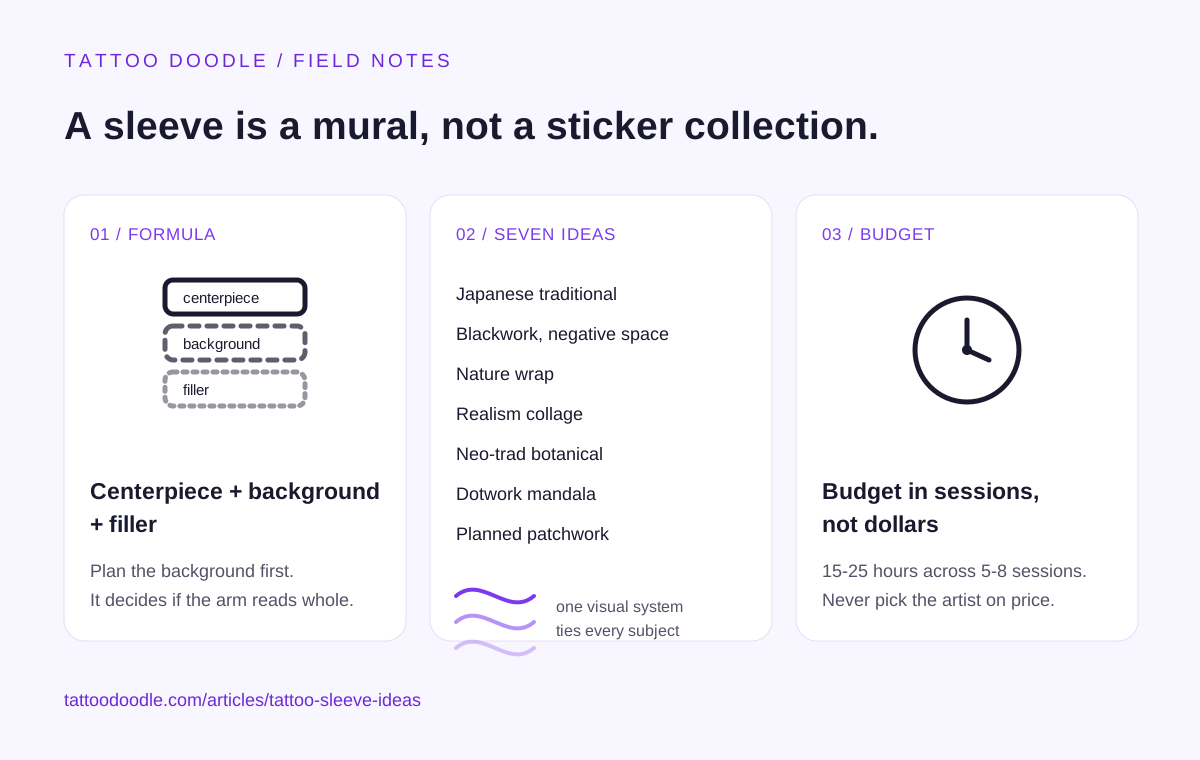
A good sleeve is a mural, not a sticker collection: one strong centerpiece, a unifying background, and filler to close the gaps. The seven ideas that work best at arm scale are Japanese traditional, blackwork with negative space, a nature wrap, a realism collage, neo-traditional botanical, ornamental dotwork, and a deliberately planned patchwork. A full sleeve typically takes 15 to 25 hours across 5 to 8 sessions — budget in sessions, not dollars, and start with the centerpiece on the shoulder or forearm where it gets seen.
A sleeve is the biggest commitment in tattooing. Not the most painful, not the most expensive per square inch — the biggest in total. A full sleeve typically runs 15 to 25 hours in the chair across 5 to 8 or more sessions, spread over months, at a total cost that lands somewhere in the price range of a used car. You do not get to "try it and see." You plan it like a mural, because that is what it is: the largest single canvas most people will ever commission.
And yet most sleeves fail in exactly the same way. The owner collects cool images for a year — a wolf here, a quote there, a clock, a rose — brings a folder of disconnected flash to the shop, and the artist does their best to tile a collage onto an arm. The result reads as a sticker collection: busy, flat, and aging unevenly because every piece was designed for a different scale. The tragedy is that the fix is not talent or money. It is planning. This guide gives you seven sleeve ideas that genuinely work at arm scale, and the planning formula that separates sleeves people stare at from sleeves people regret.
1. The Only Planning Formula You Need: Centerpiece, Background, Filler
Before the seven ideas, learn the formula, because every great sleeve on this list uses it whether the owner knows it or not. A sleeve has three layers:
- Centerpiece (one, maybe two): the subject everything else serves. A koi, a portrait, a wolf, a skull, a flowering branch. It sits on the highest-visibility real estate — shoulder cap or outer forearm — and it is drawn at the largest scale on the arm.
- Background (one unifying system): the connective tissue. Japanese wind bars, clouds, smoke, water, dotwork gradients, geometric patterns. This is the layer most first-timers skip, and it is the layer that makes a sleeve read as one piece instead of five tattoos that happen to share an arm.
- Filler (as needed): the small elements that close negative space so the composition never looks unfinished — leaves, stars, petals, small ornaments, stipple shading.
Here is my editorial rule of thumb, and it is the single most useful thing in this article: spend half your planning conversation on the background, not the subjects. Anyone can pick a cool koi. The background is what decides whether the koi looks like it belongs on your arm or was pasted there. When you sit down with an artist, the sentence you want to say is not "I want a dragon and a tiger" — it is "I want a Japanese sleeve; help me choose the background system that ties a dragon and a tiger together." That sentence tells the artist you understand the assignment, and it is the difference between a $3,000 mural and a $3,000 collage.
2. Seven Sleeve Ideas That Work at Arm Scale
Each of these earns its place for a specific reason: it scales to a full arm without the composition falling apart.
Japanese Traditional (Irezumi-Inspired)
The original full-sleeve technology. Dragons, koi, tigers, cherry blossoms, chrysanthemums — unified by wind bars and clouds that flow around the arm's curves. This style was engineered over centuries for exactly this canvas, and it shows: the background systems (wind, water, clouds) were designed to wrap limbs, and the bold outlines and limited palette age as well as any large-scale work in existence. If your priority is a sleeve that still reads clearly in twenty years, start here. The trade-off is commitment to the aesthetic — Japanese sleeves have a visual grammar, and freelancing outside it (a photorealistic portrait floating in wind bars) usually weakens the piece.
Blackwork With Negative Space
Heavy black fills — solid black sections, blackout panels — carved with negative-space geometry, mandalas, or ornamental linework that is your skin showing through. This is the highest-contrast option on the list, which means it ages superbly and reads from across the room. The planning insight: blackwork sleeves live or die on the negative space. The black is easy; the skin-colored design inside the black is the art. Ask the artist to show you healed blackwork specifically — fresh black always looks dramatic, and the negative-space details are where spreading shows up first.
The Nature Wrap
A continuous landscape that spirals up the arm: forest treeline, mountain ranges, ocean waves, a night sky bleeding into dawn. This works because nature is one of the few subjects that is supposed to be continuous — there are no awkward seams in a forest. It is also the most forgiving option for a first sleeve: organic shapes hide the transitions between sessions better than geometric work, and a good artist can extend it later (half sleeve today, full sleeve next year) without the join showing. Keep the horizon line consistent around the arm or the wrap looks like it is falling off.
The Realism Collage (Done Right)
Portraits, animals, objects rendered in black-and-gray realism — the style everyone asks for, and the one most often executed badly at sleeve scale. It works only with the formula from section 1 applied ruthlessly: the realism pieces are the centerpieces, and they need a unifying background (smoke, clouds, stone texture) built in deep blacks for contrast. The failure mode I see constantly is five soft mid-tone portraits with no background — each one fine alone, together a gray blur within years. Realism is the style where artist selection matters most: demand healed realism photos, specifically of large work, not fresh close-ups.
Neo-Traditional Botanical
Large flowers — peonies, roses, chrysanthemums — drawn big and bold with decorative leaves, buds, and ornamental framing filling the gaps. Floral work is the sleeper hit of sleeve planning: flowers are naturally scalable (a peony can be palm-sized or cover a shoulder), the bold outlines age well, and the subject matter stays meaningful across decades in a way trend-driven imagery often does not. This is also the best "first sleeve" pick for anyone nervous about committing to a theme — botanical backgrounds accept almost any centerpiece later.
Ornamental Dotwork Mandala
Geometric mandalas, symmetrical ornamental panels, and dotwork gradients flowing from shoulder to wrist. The most meditative option visually, and the most technically demanding: symmetry on a curved, moving arm is genuinely hard, so this is not the sleeve to price-shop. Stencil placement takes longer, and you should expect the artist to freehand-adjust on the skin. The payoff is a sleeve with no "front" — it looks intentional from every angle, which is rare. Fair warning from the aging chapter: fine dotwork softens faster than bold blackwork, so keep the core geometry bold and let only the gradients go delicate.
The Deliberately Planned Patchwork
The sticker sleeve — but on purpose. Individual small-to-medium designs (flash-style) placed with a unifying line weight, a consistent black-and-gray or limited-color palette, and planned filler from day one. This is the answer for people who genuinely cannot pick one theme, and it works if the unification rules are set before the first piece: same line weight family, same palette, filler planned for the gaps. What makes random patchwork look random is not the variety of subjects — it is the variety of execution. Lock the execution rules and the variety becomes the point.
3. Budget in Sessions, Not Dollars
Here is the practical math nobody tells you upfront. A full sleeve is typically 15 to 25 hours of tattooing. Most artists work in 4- to 6-hour sessions, so you are looking at roughly 5 to 8 sessions, spaced 2 to 4 weeks apart for healing. That means a sleeve is a 4- to 8-month project minimum — and that timeline is a feature, not a bug. It gives you and the artist time to adjust the plan as the piece develops.
Cost-wise, a full sleeve from a competent artist in the US typically lands in the low thousands of dollars, varying enormously by artist rate, city, and style. The number I want you to internalize is not the total but the session framing: you are not buying a $3,000 tattoo, you are buying six $500 sessions. That reframe matters because it is how you should evaluate quotes — an artist quoting per-session with a clear session count is planning your sleeve; an artist quoting a flat number without breaking it down may not be. And never choose a sleeve artist on price. The cheapest sleeve is the most expensive tattoo you will ever get, because laser removal or a cover-up costs a multiple of the original.
4. Know Your Arm Zones
Not all arm real estate is equal, and the placement plan is half the design:
- Shoulder cap and outer arm: the billboard. Most visible, best aging (thicker skin, less sun than you think under sleeves), lowest pain. Your centerpiece lives here.
- Outer forearm: the showcase. What you see when you look down, what others see when you gesture. Second centerpiece or the climax of the background flow.
- Inner forearm and inner bicep: the fade zones. Thinner skin, more sun exposure in daily life, and detail here softens fastest. Keep inner-arm work bolder and simpler than you think it needs to be.
- Elbow and ditch (inner elbow): the pain tax. The elbow is famously spicy and the skin there heals unpredictably; many artists plan simpler filler (dotwork, shading) over the elbow rather than critical detail. Budget an extra session mentally — elbow work often needs a touch-up pass.
The practical takeaway: draw the sleeve plan on a template with these zones marked, and put your most important imagery where the arm shows it best and ages it slowest. A koi on the outer forearm at year ten beats a koi on the inner bicep at year ten, every time.
5. The Consultation: Five Questions That Reveal Everything
You are interviewing the artist as much as they are advising you. Ask these:
- "What background system would you build for these subjects?" — If they cannot answer immediately, they are not a sleeve planner.
- "Can I see healed photos of your large-scale work, six months or older?" — Fresh sleeves always look good. Healed sleeves tell the truth.
- "How many sessions do you estimate, and what happens in each?" — You want a session map, not a shrug.
- "What would you simplify?" — A good artist will tell you which of your ideas will not survive at scale. An order-taker will say yes to everything.
- "What is your touch-up policy?" — Elbow, ditch, and inner-arm areas commonly need a pass. Know the terms now.
And bring references, not just ideas — but bring sleeves you like, not just isolated images. "I like how this sleeve flows" teaches the artist more than ten pictures of tigers.
6. What Ruins Sleeves (Avoid These)
- Starting without the background planned. The number-one killer. Every orphan tattoo on your arm makes the eventual sleeve harder and more expensive.
- Centerpieces drawn too small. A sleeve of medium-sized images with no anchor reads as busy. One element should dominate.
- Ignoring the elbow. Pretending it is just more arm leads to the worst-healed square inch of the project.
- Chasing trends for a 20-hour piece. Fine-line micro-detail across a full arm is a maintenance contract you sign for decades. Trendy today, touch-up schedule forever.
- Rushing the timeline. Sessions crammed together to "get it done" heal worse. The arm needs its 2 to 4 weeks between sessions. Patience is part of the design.
FAQ
How many sessions does a full sleeve take?
Typically 5 to 8 sessions of 4 to 6 hours each, spaced 2 to 4 weeks apart — so 4 to 8 months total. Dense blackwork or realism can push past 10 sessions. If an artist promises a full sleeve in two sessions, ask what they are skipping.
How much does a tattoo sleeve cost?
In the US, a full sleeve from a competent artist typically costs in the low thousands of dollars, varying widely by hourly rate, city, and style. Evaluate quotes per session with a session count attached, not as a single flat number — and never pick a sleeve artist on price alone.
Does a full sleeve hurt more than smaller tattoos?
The pain per minute is the same; the difference is endurance. Long sessions (5+ hours) wear you down, and certain zones — elbow, inner bicep, wrist — are notably spicier than the outer arm. Most people find sessions 3 through 5 psychologically harder than session 1. Eat beforehand, bring sugar, and tell the artist when you need a break.
Can I start with a half sleeve and extend it later?
Yes, and it is often the smarter move. Plan the half sleeve with the extension in mind from day one: choose a background system that continues naturally (clouds, wind bars, forest), and leave the inner upper arm relatively open. Tell the artist the full sleeve is the eventual goal — a good one will design the half sleeve as phase one, not a finished piece that later needs reworking.
What tattoo sleeve style ages the best?
Bold construction ages best at any scale: Japanese traditional and heavy blackwork lead, because thick lines and high contrast survive a decade of ink spread. Fine-line and delicate dotwork sleeves need a touch-up plan every 5 to 8 years. Whatever style you choose, the inner arm will fade fastest — keep detail there bold.
Should my sleeve have a single theme?
It should have a single visual system — one background, one line-weight family, one palette logic. The subjects can vary (that is what the planned patchwork option is for). What reads as chaotic is not mixed subjects but mixed execution: a fine-line rose next to a bold traditional tiger next to a watercolor splash. Lock the execution rules and variety becomes intentional.
Related Articles
- Tattoo Styles: What Every Major Style Is, How It Ages, and How to Choose Yours
- Tattoo Cover Up: What Actually Works (and What Artists Wish You Knew)
- Tattoo Design: The 7 Questions Your Design Must Answer Before You Book
- Tattoo Stencils Explained: How Artists Transfer Your Design (and the 5-Minute Check Before the Needle)