How to Design a Tattoo Stencil at Home: The 5-Step Workflow (2026 Guide)
Learn how to design a tattoo stencil at home with a five-step workflow: the right tools, line weights that survive the transfer, print-at-scale sizing, thermal versus inkjet stencil paper, and the three home checks artists actually use.
Quick answer
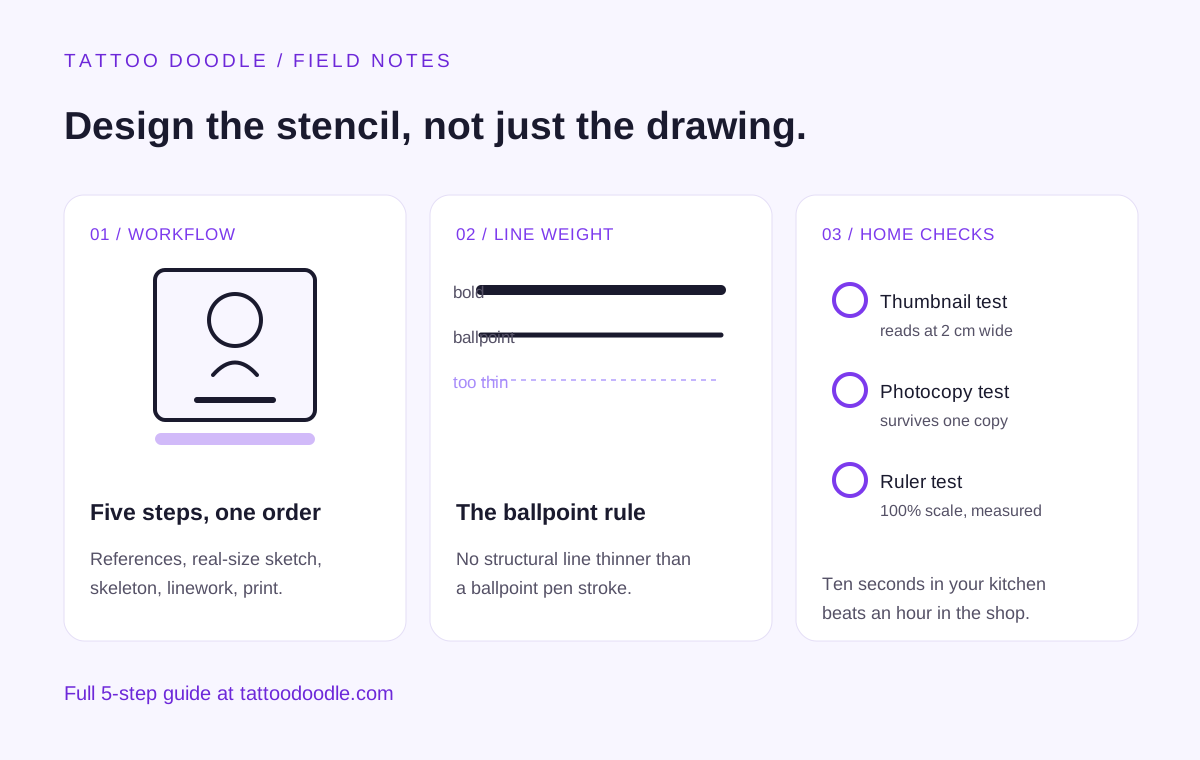
To design a tattoo stencil at home: draw your design at real size, keep outlines at least as thick as a ballpoint pen stroke, mirror it if your placement demands it, and print at one hundred percent scale on thermal or inkjet stencil paper. The three home checks that matter are the thumbnail test (it should read clearly at two centimeters wide), the photocopy test (one generation of copying should not kill any line), and the ruler test (measure the print — 'fit to page' silently shrinks your design). Bring the stencil to your consultation; most artists redraw or refine it, which is normal.
Most bad stencils are designed perfectly — for the screen, not the skin. Someone spends three hours on a gorgeous drawing, zooms in to two hundred percent, refines hairline details that look amazing on a tablet, prints it, and watches the artist shake their head. Not because the art is bad. Because a stencil is not a drawing. It is a set of instructions for a needle, and instructions have to survive a journey: from your screen to paper, from paper to skin, and from fresh skin to healed skin ten years later. Every detail that cannot survive that journey is decoration, and decoration costs you your consultation.
This guide is the workflow I would give a friend who wants to design a tattoo stencil at home before their appointment. Five steps, the line-weight rule that decides everything, three checks you can run in your kitchen, and the mistakes that waste consultations. Bring a stencil built this way and your artist will spend the session refining art instead of rescuing it.
1. Understand the Stencil's Three Jobs First
Before you draw a single line, understand what a stencil is for. It has exactly three jobs, and a design only works if it does all three:
- Transfer fidelity. The design has to survive being printed, copied, or thermally transferred onto skin without losing its structure. A line that vanishes in one generation of copying never reaches the skin.
- Artist readability. Your artist traces this stencil with a needle. They need to read every line at a glance, under shop lighting, on a curved surface, while working. Ambiguous scribbles get simplified on the fly — and "simplified on the fly" is rarely the simplification you would choose.
- Aging. Thin, dense, closely spaced lines spread and merge as skin ages. A stencil designed for year one only becomes a gray blob by year ten. Designing the stencil is designing the aging.
Here is the mindset shift, and it is the single most useful idea in this article: design for the stencil, not for the skin. The finished tattoo will have shading, texture, and nuance the stencil never shows. The stencil shows one thing — the skeleton. If the skeleton is strong, the artist can hang anything on it. If the skeleton is fragile, no amount of shading saves it.
2. The 5-Step DIY Stencil Workflow
This is the practical sequence. Do not skip ahead to drawing.
Step 1: Collect references, not one reference
Gather five to ten reference images: the style you want, the subject, and — critically — healed tattoos in that style, not just fresh ones. Fresh tattoos always look crisp; healed photos show you which line weights and spacings actually survive. Save them in one folder and study them for one thing only: how much empty space sits between the lines. That spacing is the part beginners always underestimate.
Step 2: Sketch at real size
This is where most home designs die. People sketch on a big screen, zoomed in, and the design "feels" right at six inches wide — then it gets printed at two inches and collapses. So: decide the placement and the real dimensions first (a forearm piece might be four by six inches; a wrist piece two by two), and draw at that size from the start. In a digital app, set your canvas to the real print dimensions. On paper, draw a box the real size and stay inside it. If you cannot draw it well at real size, it will not tattoo well at real size.
Step 3: Separate the skeleton from the shading
Redraw your sketch twice. The first pass is the stencil pass: only the lines the needle will follow — outer contours, major internal divisions, placement anchors. The second pass is the shading pass: gradients, stipple, texture. Your stencil is the first pass only. This separation forces the key discipline of stencil design: the design must work as pure line art. If it only works with shading, the stencil is not done.
Step 4: Clean up the linework
Now enforce the line-weight rule (full detail in section 3). Merge wobbly double lines into single confident strokes. Delete every line that does not change the design if removed — decorative hatching that will not survive the transfer is noise, and noise makes the artist's job harder. Simplify clusters: three thin parallel lines become one bold one with breathing room on both sides. This is the least fun step and the one that most improves the final tattoo.
Step 5: Mirror, size, and print
If your placement is anywhere the design has a handedness — text, a profile facing a direction, an asymmetrical composition — flip the canvas horizontally and check that it still works. Then print at one hundred percent scale, no "fit to page," and measure the print with a ruler (see the ruler test in section 4). Tape the printout to your body where the tattoo will go, step back three meters, and look in a mirror. This is the closest you will ever get to previewing the tattoo before it is permanent, and it catches sizing mistakes nothing else catches.
3. Line Weight: The Rule That Decides Everything
Line weight is the technical heart of stencil design, and the rule is simple enough to memorize:
The ballpoint rule: no structural line thinner than a ballpoint pen stroke.
A standard ballpoint draws roughly a half-millimeter line. If a line in your stencil is thinner than that, treat it as decorative — it may survive the transfer, but you cannot count on it surviving ten years of skin. Outlines that define the design's silhouette should be bolder still, roughly twice that, because the outline carries the aging. Fine interior detail — the kind that makes a drawing look rich on screen — should be spaced generously: keep at least a couple of millimeters of skin between parallel details, because ink spreads under skin over time and close lines merge into one.
Why does this matter more for stencils than for drawings? Because every transfer generation eats a little weight. Screen to print loses a touch. Print to thermal copy loses a touch. Skin stretches the design as it is applied. What starts hairline-thin arrives invisible. Designing one weight class bolder than your instinct is not overbuilding — it is accounting for the journey.
4. The Three Home Checks Artists Actually Use
You do not need a shop to validate a stencil. Run these three checks in your kitchen:
The thumbnail test. Shrink your design on screen until it is about two centimeters wide — roughly a thumbnail. Can you still tell what it is? Can you still read the main shapes? If the design turns to mush at thumbnail size, the transfer will turn it to mush on skin, because skin is a worse canvas than your screen. This test kills more bad stencils than any other, and it takes ten seconds.
The photocopy test. Photocopy your printout once — or screenshot it, print it, and compare. Every line that matters must survive one generation of copying with its weight and position intact. If a line fades, breaks, or merges with its neighbor, redraw it bolder or delete it. One generation of copying is the minimum journey your stencil will take; most take two.
The ruler test. Measure the printout. Compare it to the dimensions you decided in Step 2. Printers and apps love to "helpfully" scale things — fit-to-page, shrink-to-fit, automatic margins — and a design that silently shrinks fifteen percent is a different design. If the measurement is off, fix the print settings and reprint. Never hand-adjust by stretching the image; stretching distorts line weights unevenly.
A stencil that passes all three is a stencil an artist can work with. That is the bar. Not beauty — workability.
5. Tools: What to Actually Use
You do not need expensive software. What you need is a tool that lets you draw at real dimensions, work in layers, and flip the canvas. Honest rundown:
- Paper and pen first. For the first three designs you ever make, paper beats every app. A fineliner on paper teaches line confidence faster than an undo button, and a photocopier is the original stencil machine. Do not let tool shopping delay drawing.
- Free digital: Krita or MediBang Paint. Both handle layers, canvas sizing in inches or centimeters, and horizontal flip. Krita is the stronger drawing tool; MediBang is lighter and simpler. Either is enough for stencil work — you are drawing lines, not painting.
- Inkscape (free) for geometric work. If your design is mandala, geometric, or lettering-based, a vector tool gives you perfectly smooth curves and trivial resizing without quality loss. The learning curve is steeper, but for line-based designs it is the right tool.
- Procreate (paid, iPad). The most popular choice among artists for a reason: fast, excellent brushes, and the canvas flip gesture is instant. If you already own an iPad, it is the pleasant option. If you do not, do not buy one for stencil design — the free tools above are sufficient.
- Our generator. If you want to explore directions before committing to linework, the free tattoo generator at tattoodoodle.com produces design concepts you can trace over and convert into stencil skeletons — a fast way to test ten compositions before drawing one seriously.
The tool matters less than the discipline: real size, separated skeleton, cleaned linework. A fineliner and a ruler beat a expensive app used sloppily.
6. Paper and Printing: Thermal vs. Inkjet Stencil Paper
Your artist will likely re-transfer your design onto their own stencil paper, but bringing a properly printed stencil still helps — and if you are practicing application with a willing friend, the paper matters:
- Thermal stencil paper is the shop standard: four layers (including the purple dye sheet) that run through a thermal copier or thermal printer. It produces the crispest transfers and is what your artist's machine expects. A pack is cheap, and practicing with the real medium teaches you what line weights actually transfer.
- Inkjet/laser stencil paper lets you print directly from a home printer. More convenient, slightly less crisp, and laser printers can melt cheap stencil sheets — check the paper's heat rating. Fine for practice and for bringing a clean reference to your consultation.
- Hand-traced transfer paper (spirit paper + ballpoint) is the old-school method and still excellent for small designs. Tracing by hand forces you to decide which lines matter — it is the photocopy test with extra steps, and your stencil comes out pre-simplified.
Whichever you use, the rule from Step 5 stands: print at one hundred percent, measure with a ruler, and tape it to your body. The medium is not the message; the measurement is.
7. Seven Mistakes That Waste Your Consultation
- Designing zoomed in. The number one home-design failure. Always draw at real size.
- Fit-to-page printing. Silently shrinks your design. One hundred percent or nothing.
- Hairline detail as structure. If the design needs the thin lines to be readable, the design is not finished.
- No mirror check. Text backwards, profiles facing the wrong way — caught in ten seconds, embarrassing forever.
- Bringing only a phone screen. Screens lie about size and weight. Bring a measured printout.
- Over-detailed shading in the stencil. Shade on a separate layer or page. The stencil is the skeleton.
- Treating the artist's redraw as an insult. It is not. A good artist redraws your stencil to make it tattooable — better line weights, corrected flow for the body part, spacing that ages. The home stencil's job is to communicate your vision clearly, not to be the final art. Let the professional finish it.
The Bottom Line
Designing a tattoo stencil at home is a learnable craft, not a talent. Draw at real size, separate the skeleton from the shading, keep every structural line at least ballpoint-bold, and validate with the thumbnail, photocopy, and ruler tests. Bring the measured printout to your consultation and expect your artist to refine it — that collaboration is the process working as designed. And if you want to explore compositions before you commit to linework, generate directions free at tattoodoodle.com, then convert your favorite into a stencil skeleton using the workflow above.
FAQ
Can I bring my own stencil design to a tattoo artist?
Yes — artists welcome it. A clean, real-size stencil communicates your vision far better than a vague description or a phone screenshot. Expect the artist to redraw or refine parts of it for tattooability; that is standard practice, not a rejection of your design.
What is the best free tool to design a tattoo stencil?
For hand-drawn styles, Krita or MediBang Paint (free, layers, real-size canvases, canvas flip). For geometric, mandala, or lettering designs, Inkscape (free vector). Paper and a fineliner remain the fastest way to learn. The tool matters less than drawing at real size and cleaning up linework.
How thick should stencil lines be?
Use the ballpoint rule: no structural line thinner than a standard ballpoint pen stroke (about half a millimeter), with silhouette outlines roughly twice that. Interior details need breathing room — a couple of millimeters of space between parallel lines — because ink spreads under skin over time.
Should I mirror my stencil design before printing?
Check it mirrored, always. Flip the canvas horizontally and confirm text still reads correctly and directional elements still face the way you want. Whether you hand over the mirrored or unmirrored version depends on your artist's transfer process — bring both on one page and let them choose.
Why did my printed stencil come out the wrong size?
Almost always "fit to page" or "shrink to fit" in the print dialog, which silently scales your design — often by ten to twenty percent. Set scaling to one hundred percent (sometimes labeled "Actual size"), print, and verify with a ruler before you leave for the shop.